The Linux Command tree is a useful tool for visually inspecting the structure of your file system. In this post, we will explore how to use the tree command and its various options.
Table of Contents
What is the tree command?
The tree command visualizes directories and files in a tree structure. It is very useful for quickly understanding complex directory structures. By default, executing the tree command will display all subdirectories and files in the current directory in a tree format.
Installing the tree command
The tree command is not installed by default on most Linux distributions. Therefore, you need to install it first. The installation method varies depending on the distribution, but here are the typical methods:
Ubuntu and Debian-based systems
sudo apt-get install treeCentOS and Fedora-based systems
sudo yum install treeOnce the installation is complete, you can use the tree command in the terminal.
Basic usage of the tree command
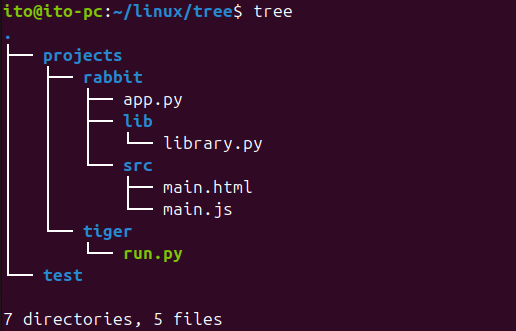
Using the tree command is very simple. Just type tree in the terminal and press enter to see the tree structure of the current directory.
treeExecuting this command will output the tree structure of the current directory and its subdirectories and files as shown below.
Specifying a directory
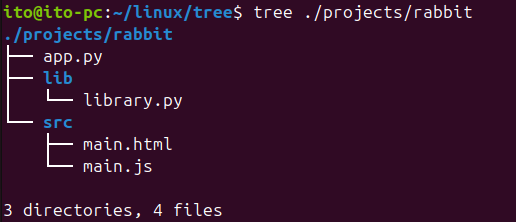
If you want to see the structure of a specific directory, add the directory path after the command.
tree /path/to/directoryFor example, to check the directory structure under ./projects/rabbit, pass that path as a parameter.
Key options for the tree command
The tree command offers various options to customize the output format. Let’s take a look at the main options.
Displaying directories only (-d)
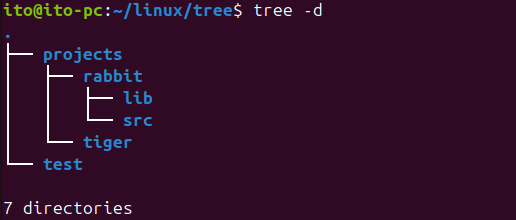
To view only the directory structure without files, use the -d option.
tree -dThis will display only the directories, hiding the files.
Limiting depth (-L)
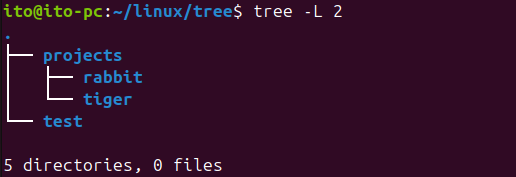
When dealing with deep directory structures, too much information can be overwhelming. Use the -L option to limit the depth of the tree.
tree -L 2This command limits the output to a maximum of two levels depth from the current directory.
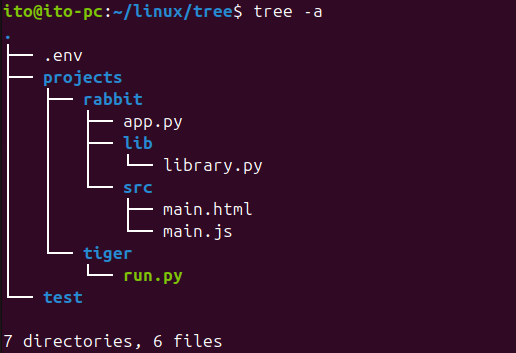
Including hidden files (-a)
By default, the tree command does not display hidden files (files starting with a dot). Use the -a option to include hidden files in the output.
tree -aWith the -a option, hidden files like .env will be displayed in the tree structure.
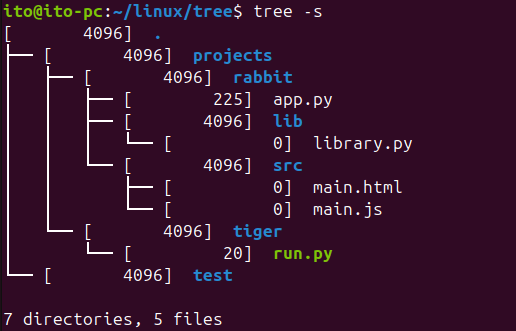
Displaying file sizes (-s)
To display the sizes of files and directories, use the -s option.
tree -sThe -s option shows sizes in bytes.
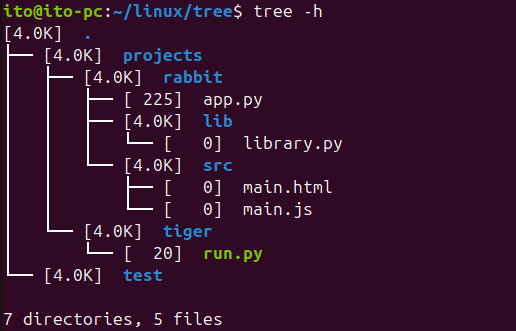
Displaying file sizes in a human-readable format (-h)
For a more readable display of file and directory sizes, use the -h option.
tree -hThe -h option displays sizes in a human-readable format, using units like K, M, and G.
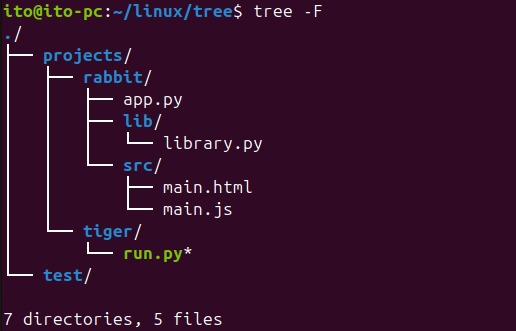
Displaying file types (-F)
To indicate the type of each file, use the -F option.
tree -FWith this option, directories are marked with a slash (/), and executable files with an asterisk (*).
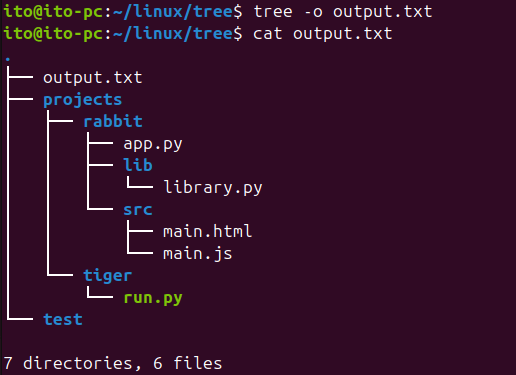
Saving output to a file (-o)
To save the tree command output to a file, use the -o option.
tree -o output.txtThis command saves the tree structure to the output.txt file.
Practical uses
Inspecting large project structures
The tree command is useful for quickly understanding the directory structure of complex projects. This is particularly helpful in software development projects for quickly grasping the structure of source code files and directories.
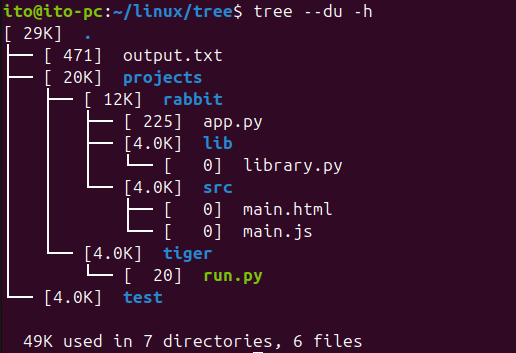
Checking directory usage (–du)
Just like the du command, you can use the --du option with the tree command to check the usage of directories and files. This helps in identifying which directories are consuming the most space.
Managing files
Visually inspecting the directory structure helps in managing unnecessary files or directories. After understanding the overall structure using the tree command, you can delete or move unwanted items.
Precautions
The tree command can take a long time to output large directory structures, especially when the directory depth is significant or there are many files. In such cases, it is advisable to use the -L option to limit the output level.
Additionally, if the output is too long, it is more efficient to save it to a file using the -o option and then view it with a text editor.
Summary
In this post, we explored how to use the tree command in Linux and its various options. The tree command is a highly useful tool for visually inspecting directory structures and can be used in many different scenarios. Whether for project management, checking disk usage, or organizing files, this command is worth trying out. By effectively utilizing its options, you can manage your system more efficiently.